Multitasking II, Synchronizing Tasks
After reviewing the classes to implement the basic multitasking, in this article I will review different mechanisms that allow a synchronization between various tasks, all of them defined in the System.Threading namespace, with which you can organize the work when the Interactions between tasks require a particular order.
If you want to start at the beginning, this is the first article in the series about multithreaded applications.
In this link you can download the MultithreadingDemo application source code with the examples, written in csharp with Visual Studio 2015. The application uses version 4.5 of the .NET Framework.
In most multi-threaded applications, it is not enough to launch multiple tasks in parallel and wait for them all to end, each by its side. Many times some of the tasks require that another one or others have finished their work to start doing theirs. To do this, there are several standard synchronization mechanisms that can be used in the different scenarios that can be presented.
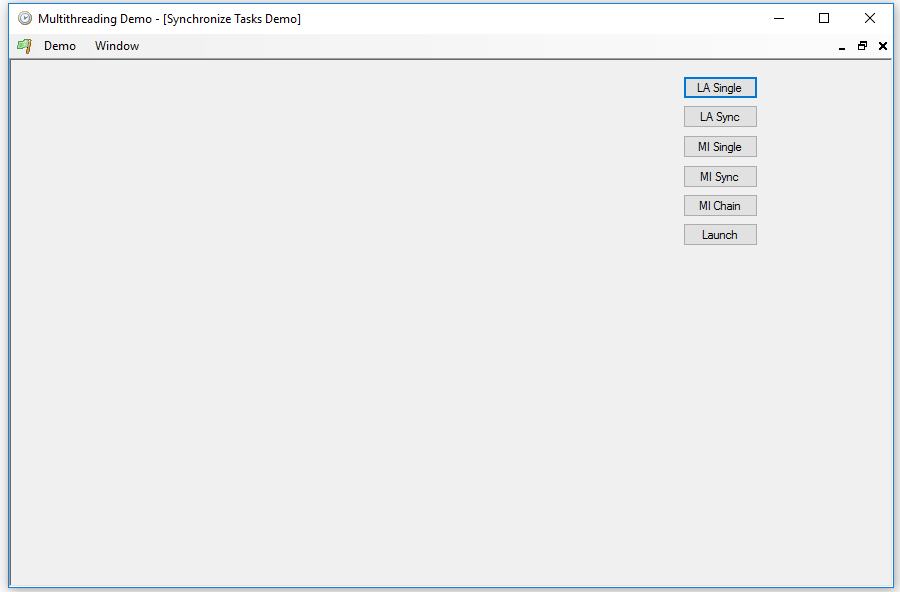
But there is not free-lunch in the use of these mechanisms. All of them are quite costly in process time, and may even make sequential execution preferable to the parallel one. The examples that I am going to use, besides serving to understand the operation of these mechanisms, also try to show its high cost. They are, as in the previous article, calculation processes that use mostly processor time. In fact, they are also examples of when these mechanisms should not be used. To access them, use the Synchronize option in the Demo menu.

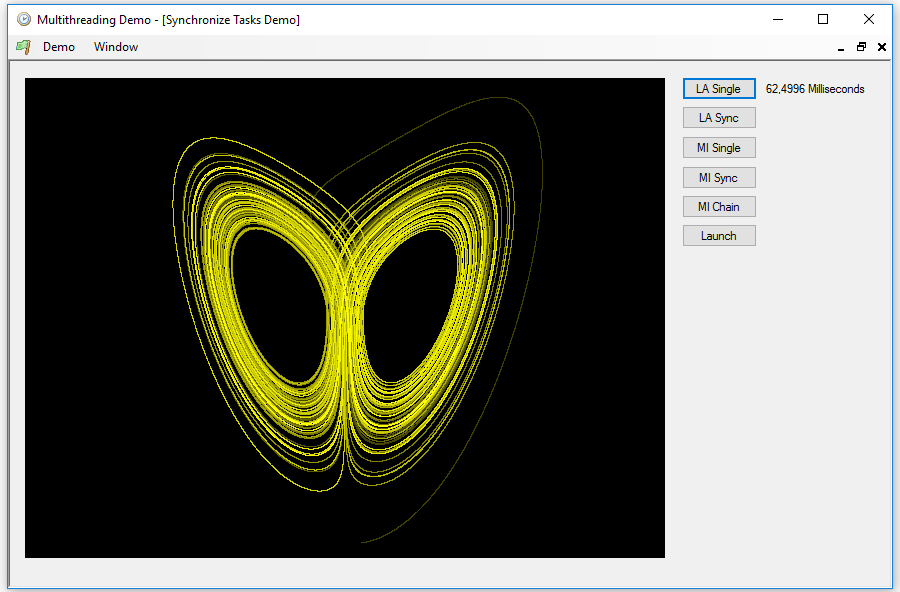
Let's start, as always, with a sequential process. The first example draws a Lorenz attractor without making use of the tasks at all. It is a system of three differential equations for the x, y, and z coordinates of the attractor, each of which calculates the increment of each variable at the current instant. This means that, in order to calculate any of the points, we must first have calculated all the previous ones. In addition, each equation depends on all or almost all the variables, so we have to calculate them all before increasing the values of the coordinates. The calculations for each variable are also quite simple, so it is clearly an inappropriate process for the use of multitasking. We can launch this process using the LA Single button, this is the code that will be executed:
x = 1;
y = 1;
z = 1;
...
ix = 0;
while (ix < 1920000)
{
    dx = 10 * (y - x);
    dy = x * (17 - z) - y;
    dz = x * y - z;
    x += dt * dx;
    y += dt * dy;
    z += dt * dz;
    xx = (int)(x * 16 + 320);
    yy = 480 - (int)(z * 16);
    color = 63 + ix / 10000;
    _bitmap[xx + 640 * yy] = Color.FromArgb(color, color, 0).ToArgb();
    ix++;
}
And this is the result. As always, the total process time appears to the right of the button:

Since the process consists first of calculating the increments of the variables (dx, dy and dz) and then perform the increment itself and then calculate the projection of the three-dimensional space into a two-dimensional one, in order to draw the point, we could separate the calculation and projection parts into two separate tasks, thinking to make it even faster. To do this, we can define two different tasks, but we have the problem that the calculation must always be executed before the projection, when it is finished, we can carry out the projection while the next calculation is executed.
The first mechanism I'm going to show is the CountdownEvent class. Its operation is very simple. It is initialized with a certain integer value, a process calls the Wait method, then it is stopped, and one or more processes call the Signal method that decrements the value of the counter in one unit. When the counter reaches zero, the process that was waiting can continue its execution. The Reset method returns the counter to its initial value. With this mechanism we will wait for the task that performs the calculations.
To stop the calculations we will use another mechanism, using the AutoResetEvent class. This mechanism is even simpler. The object is initialized with a Boolean value true or false, when a task calls the WaitOne method, it will be stopped if the value is false, and it will continue when it is set to true. This will cause the value to automatically revert to false. To set the value to true, the Set method is used. With this mechanism, only a single process can be released.
The task to perform the calculations, TaskDxyz, is as follows:
private void TaskDxyz()
{
    while (ix < 1920000)
    {
        dx = 10 * (y - x);
        dy = x * (17 - z) - y;
        dz = x * y - z;
        _cdEvent.Signal();
        _arXYZ.WaitOne();
    }
}
At the end of the calculations, it decrements the counter of the CountdownEvent, which in this case has the value of one, to indicate that it has finished, and waits until it be able to continue by using the AutoResetEvent.
The task that performs the projection, TaskCalc, is the following one:
private void TaskCalc()
{
    while (ix < 1920000)
    {
        _cdEvent.Wait();
        x += dt * dx;
        y += dt * dy;
        z += dt * dz;
        _cdEvent.Reset();
        _arXYZ.Set();
        xx = (int)(x * 16 + 320);
        yy = 480 - (int)(z * 16);
        color = 63 + ix / 10000;
        _bitmap[xx + 640 * yy] = Color.FromArgb(color, color, 0).ToArgb();
        ix++;
    }
    _arXYZ.Set();
}
The thread starts waiting for the CountdownEvent, to make sure the calculation is finished, then, the coordinates are increased with the result, the counter is reset and the other task is released, before performing the projection. The only thing we are doing is unnecessarily increasing the processing time, making excessive use of these mechanisms, but we can verify that they work using the LA Sync button. This is the code that initializes the synchronization objects and launches the tasks:
x = 1;
y = 1;
z = 1;
...
_arXYZ = new AutoResetEvent(false);
_cdEvent = new CountdownEvent(1);
List<Task> tasks = new List<Task>();
...
ix = 0;
tasks.Add(Task.Run(() => { TaskDxyz(); }));
tasks.Add(Task.Run(() => { TaskCalc(); }));
Task.WaitAll(tasks.ToArray());
When we execute it, we get the same attractor as in the sequential case, but it will take much longer to execute. The first lesson to learn is that we do not have to make excessive use of these mechanisms, or we will get the opposite effect to the desired, a much slower application.
So let's try another example that uses far fewer calls of this type and also use more tasks simultaneously. To do this, we will first generate a series with 10000 values, using the logistic equation, and then we will perform 64 calculations of the mutual information at different distances to draw the resulting graph. For those who do not know what I'm talking about, we're going to perform 64 fairly complex mathematical calculations using eight simultaneous tasks, which have to execute eight times each one.
But first, we will perform the process sequentially to take the time. Here is the code that performs the calculations:
_points = new PointF[64];
...
Dictionary<Point, int> pairs = new Dictionary<Point, int>();
for (int off = 1; off <= 64; off++)
{
    pairs.Clear();
    int pos = 0;
    while (pos < 10000 - off)
    {
        Point pair = new Point((int)(_timeSeries[pos] * 100),
           (int)(_timeSeries[pos + off] * 100));
        if (pairs.ContainsKey(pair))
        {
            pairs[pair]++;
        }
        else
        {
            pairs[pair] = 1;
        }
        pos++;
    }
    float p = 0f;
    double dpos = pos;
    foreach (KeyValuePair<Point, int> kv in pairs)
    {
        double pc = kv.Value / dpos;
        double px = _histogram[kv.Key.X] / dpos;
        double pxo = _histogram[kv.Key.Y] / dpos;
        float pp = (float)Math.Round(pc * Math.Log(pc / (px * pxo), 2), 10);
        p += pp;
    }
    _points[off - 1] = new PointF((off - 1) * 10, 480 - 70 * p);
}
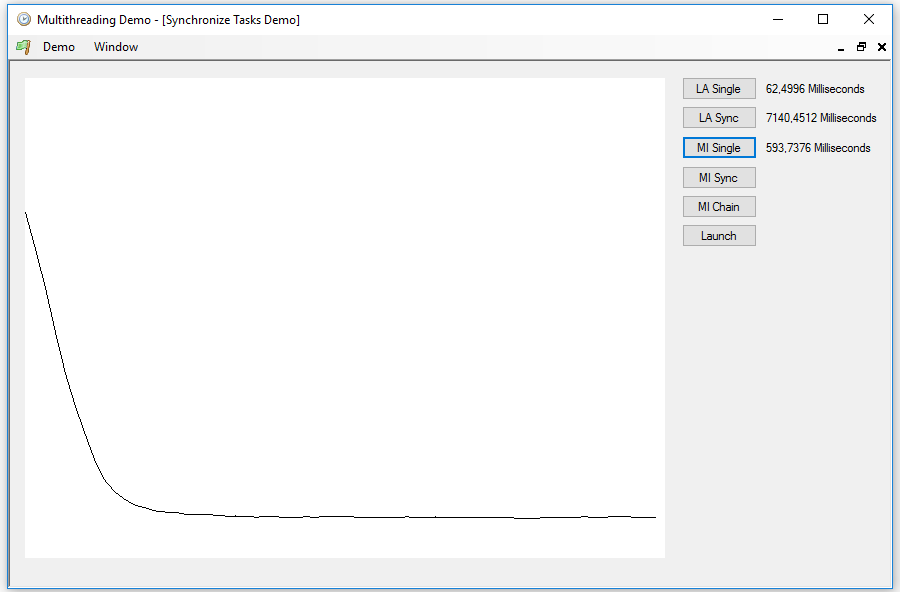
Each complete calculation is done within the for loop. As the calculations are independent of each other and, besides, it is indifferent in what order we perform them, it is evident that we can simply use a Parallel.For loop if we want to execute them in parallel. But let's see what happens if we use eight synchronized tasks instead. By pressing the MI Single button we can watch the result, this time a graph very little showy, but it takes a little more time to calculate:

In the multitasking version, we will perform the calculation of each point within a task, but since we will only use eight, we must reuse each one eight times. I will do this in a very artificial way, only to show the use of synchronization mechanisms, which, in this case, are totally unnecessary.
First, I will again use a CountdownEvent object to keep track of the processes that have been executed, initialized with a value of eight. To stop and release these eight processes, I will use a mechanism similar to AutoResetEvent, but that allows several processes to be released at the same time, because it is not automatically restarted. It is the ManualResetEvent class. It also represents a Boolean variable, and uses the WaitOne and Set methods in the same way as AutoResetEvent, but it needs to be reset to false by calling the Reset method. With the Set method, all processes that have called WaitOne will be released at once, but if we do not call Reset to return the value to false, these processes will never stop again when WaitOne is called back, because the object will remain always with the value true.
In addition to the eight work processes, there will be an additional process that must be executed when the eight have finished, in order to increase a variable that serves as the basis for the calculation and to release the calculation processes again, all at once, with the ManualResetEvent object.
We will also use another synchronization object, of the Barrier class, whose operation is similar to that of the CountdounEvent class. It is also initialized with an integer that acts as a counter. The processes call the SignalAndWait method, which causes the counter to be decremented by one unit and the process remains waiting until the count reaches zero. With this object, we will detect when all the processes are finished, which is equivalent to the use of the Task.WaitAll method.
The work processes all share the same code, in the MutualInformation method, which receives the off parameter, with a value between 0 and 7, so that each process computes a different index. This is the code:
private void MutualInformation(int off)
{
    Dictionary<Point, int> pairs = new Dictionary<Point, int>();
    while (offbase <= 64 - off)
    {
        int pos = 0;
        pairs.Clear();
        while (pos < 10000 - (offbase + off))
        {
            Point pair = new Point((int)(_timeSeries[pos] * 100),
                (int)(_timeSeries[pos + offbase + off] * 100));
            if (pairs.ContainsKey(pair))
            {
                pairs[pair]++;
            }
            else
            {
                pairs[pair] = 1;
            }
            pos++;
        }
        float p = 0f;
        double dpos = pos;
        foreach (KeyValuePair<Point, int> kv in pairs)
        {
            double pc = kv.Value / dpos;
            double px = _histogram[kv.Key.X] / dpos;
            double pxo = _histogram[kv.Key.Y] / dpos;
            float pp = (float)Math.Round(pc *
                Math.Log(pc / (px * pxo), 2), 10);
            p += pp;
        }
        _points[(offbase + off) - 1] =
            new PointF(((offbase + off) - 1) * 10, 480 - 70 * p);
        _cdEvent.Signal();
        _mrMI.WaitOne();
        _mrMI.Reset();
    }
    _barrier.SignalAndWait();
}
Upon completion of the calculations, the Signal method of the CountdownEvent decrements the counter by one unit, then the process enter in waiting mode with the WaitOne method of the ManualResetEvent. As all processes are released at the end of the wait, the Reset method of the ManualResetEvent is called immediately so that the processes are stopped again the next time.
The control process is ControlTask, and its code is very simple:
private void ControlTask()
{
    while (offbase <= 64)
    {
        _cdEvent.Wait();
        offbase += 8;
        _cdEvent.Reset();
        _mrMI.Set();
    }
    _barrier.SignalAndWait();
}
The first thing to do is to call the Wait method of the CountdownEvent, in order to wait for the eight calculation processes to finish. Then the global variable offbase with the base index of the calculations is incremented, the process counter reset to its initial value with the Reset method, and the processes are released with the Set method of the ManualResetEvent.
With the MI Sync button all these processes are launched in the usual way, using the Task class. First we initialize the synchronization objects, the CountdownEvent with a value of 8, the ManualResetEvent with false value and the Barrier object with a count of 10, eight for the work processes, one for the control task and one for the controller of the button itself:
List<Task> tasks = new List<Task>();
_mrMI = new ManualResetEvent(false);
_cdEvent = new CountdownEvent(8);
_barrier = new Barrier(10);
offbase = 1;
...
for (int ix = 0; ix < 8; ix++)
{
    int off = ix;
    tasks.Add(Task.Run(() => { MutualInformation(off); }));
}
tasks.Add(Task.Run(() => { ControlTask(); }));
_barrier.SignalAndWait();
We can see that, although the speed difference has been reduced by using fewer calls to the synchronization mechanisms, it still takes longer than the sequentially executed process.
We can make another version of this calculation by using the ContinueWith method of the Task class. This method causes one task to run immediately after another has finished, receiving as a parameter the result returned by the previous task. We will use a modified version of the above tasks, ChainMutualInformation, which returns its off parameter, of integer type. As it returns a value of type int, the class we should use to create it is no longer Task, but Task<int>. We will continue to create eight work tasks, but instead of using a single control task, we will use a modified version, ChainControlTask, following the completion of each one. This task uses an eight-position array to determine when the eight tasks were run and then increment the offbase variable. I do so because, if two tasks execute at the same time a write operation on the same memory location, an exception will occur, and I do not want to use mechanisms of concurrent access to variables, which will be the subject of the next article.
In the code of the tasks I have completely eliminated the synchronization mechanisms; otherwise, they are the same as the previous ones. With the MI Chain button we will execute this new version of the process:
_points = new PointF[64];
offbase = 1;
List<Task<int>> tasks1 = new List<Task<int>>();
List<Task> tasks2 = new List<Task>();
...
while (offbase < 65)
{
    tasks1.Clear();
    tasks2.Clear();
    _bits = new int[8];
    try
    {
        for (int ix = 0; ix < 8; ix++)
        {
            int off = ix;
            tasks1.Add(Task.Run(
                () => { return ChainMutualInformation(off); }));
            tasks2.Add(tasks1[ix].ContinueWith(
                (b) => { ChainControlTask(b.Result); }));
            Task.WaitAll(tasks2.ToArray());
        }
    }
    finally
    {
        for (int ts = 0; ts < tasks1.Count; ts++)
        {
            tasks1[ts].Dispose();
            tasks2[ts].Dispose();
        }
    }
}
As you can see, the calculation tasks are created in groups of eight and all have their continuation with the ContinueWith method, the parameter b in the expression is of class Task<int>, like the previous task, therefore we must obtain the value returned using the Result property, to pass it to the control task. With the static WaitAll method of the Task class, we wait until all of them have finished and we launch the next round. By running this code, we can see that now the speed has improved a lot, but it is still somewhat slower than the sequential process.
Finally, I will show you how we can cancel a task once it is started. To do this, the CancellationTokenSource class is used. When launching the task, the Token property of this object can be passed as a parameter of the Run method. If we want to cancel it, we will use the Cancel method of the CancellationTokenSource object, but we will also have to check this request for cancellation in the task code, and it will be the task which decides if it finishes and how it does it. To do this, the Token property of the CancellationTokenSource object has the Boolean property IsCancellationRequested.
This is the code of the task that implements this mechanism, in the CancelTask method:
private void CancelTask()
{
    _bitmap = new int[640 * 480];
    x = 1;
    y = 1;
    z = 1;
    int ix = 0;
    while (true)
    {
        if (_cancel.Token.IsCancellationRequested)
        {
            break;
        }
        dx = -y - z;
        dy = x + 0.1 * y;
        dz = 0.1 + z * (x - 14);
        x += 0.00001 * dx;
        y += 0.00001 * dy;
        z += 0.00001 * dz;
        xx = (int)((x * 8 + 320) + (0.7 * 8 * y));
        yy = 360 - (int)((z * 8) + (0.7 * 8 * y));
        color = 63 + ix / 10000;
        if ((xx + 640 * yy >= 0) && (xx + 640 * yy < _bitmap.Length))
        {
            _bitmap[xx + 640 * yy] = Color.FromArgb(color, color, 0).ToArgb();
        }
        ix++;
        if (ix > 1920000)
        {
            ix = 0;
        }
    }
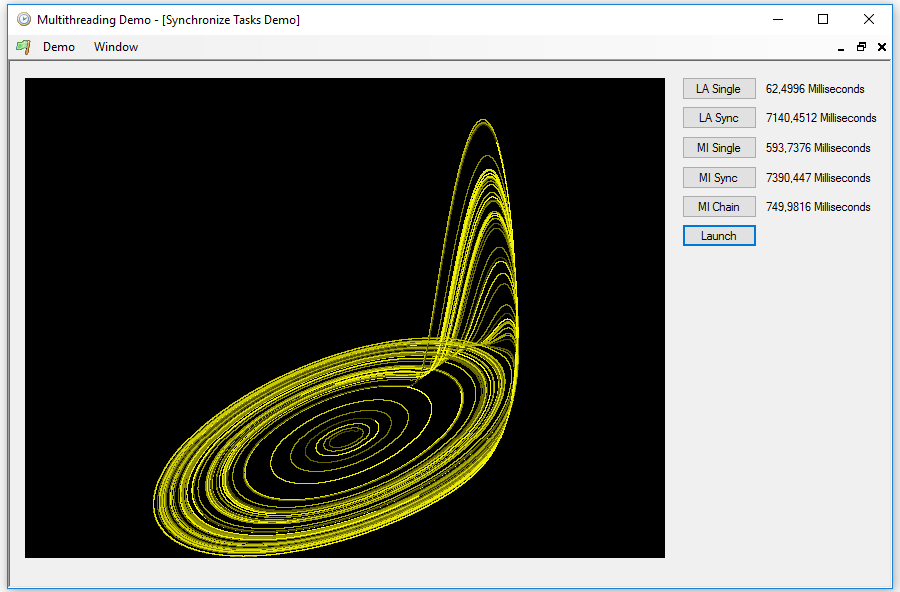
}
This task calculates and draws an attractor similar to that of Lorenz, the Rössler attractor, but uses a very small increment of time to do it quite slowly. With the Launch button we can launch the task. In this case, we will not wait for it to finish, because it will not stop until we press the button again, which will have changed to Cancel, at which point the result will be drawn:

This is the button event code:
private void bCancel_Click(object sender, EventArgs e)
{
    if (bCancel.Text == "Launch")
    {
        _cancel = new CancellationTokenSource();
        _cTask = Task.Run(() =>
        {
            CancelTask();
        }, _cancel.Token);
        bCancel.Text = "Cancel";
    }
    else
    {
    ...
        try
        {
            _cancel.Cancel();
            bCancel.Text = "Launch";
            Task.WaitAll(new Task[] { _cTask });
            ...
            pbDrawing.Image = bmp;
        }
        catch (Exception ex)
        {
            ...
            MessageBox.Show(ex.Message);
        }
        finally
        {
            _cancel.Dispose();
            _cancel = null;
            _cTask.Dispose();
            _cTask = null;
        }
    }
}
And that's all for now. In the next article I will show you how to handle concurrent access to data and other resources.


