Chess match database manager II
In this series of articles, I will comment on a chess game database manager, ChesPosDb, which you can download using this link. In the first article in this series, I explained how to load chess games in the database using PGN files, which you can download from many Internet sites. In this article and the following ones, I will show the different filter types that you can build to search chess matches in the database.
There are two different types of filters: movement filters, which select the chess games by finding a single movement or position, and chess game filters, which choose the chess matches by finding a series of movements or positions, or other conditions such as the names of the players, the result, etc.
Each filter represents a condition of a specific type, and there are different types of conditions. You can combine more than one condition to construct composite filters. Those composite filters can be of two types: in the first one, all the filter conditions must be met at once; we will call this type of compound filter an AND Filter. In the other type of compound filter, it is enough that only one of the conditions is met, although it can be met more than one; we will call this type of filter an OR Filter.
Movement and position filters
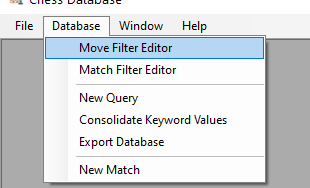
You have to use the Move Filter Editor option in the Database menu to build a movement filter:
The filter editor window will show:

The grey box is the tool to create the filters. The pane on which these filters are created is a compound filter, an AND Filter by default. You can change the type to an OR Filter by clicking the Change condition join mode button. Keep in mind that OR filters will generally be slower than AND filters. Even if you only want to specify a single condition, it is always contained within this main compound filter.
In the tool drop-down list, you can select the type of filter you want to add. Once selected, you just have to press the Add button of the tool:
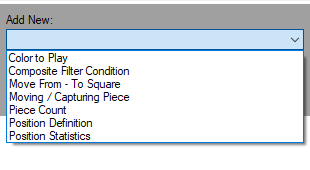
You can add an AND filter or an OR filter to the main composite filter using the second filter type, Composite Filter Condition. This option is useful for building an AND filter that contains one or more OR filters, or vice versa (an AND filter containing AND filters or an OR filter containing OR filters does not make sense unless you create them to make the filters more readable in the screen). You can only create two levels of compound filters. In the second level, you can no longer add more compound filters. Otherwise, the filters could be too complicated. Still, it is possible to build any condition composed of several filters that you can devise with these two levels.
If you add a compound filter, it will have a separate toolbox to add conditions into it:
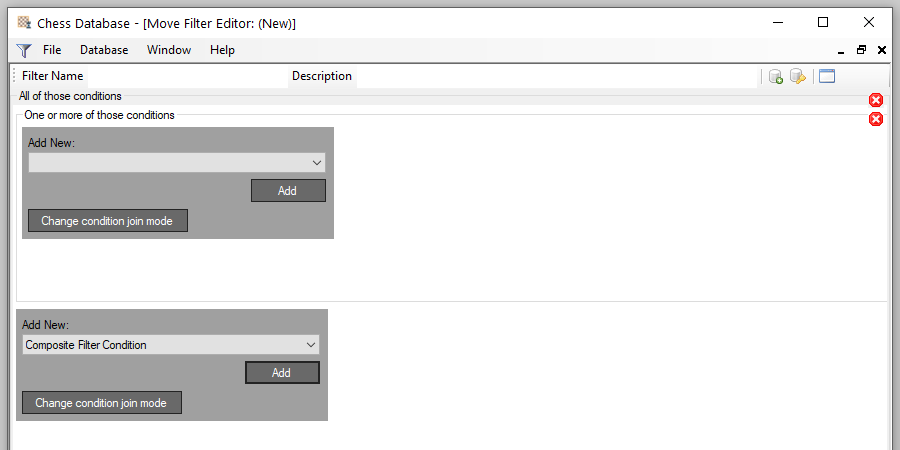
The red circle with the white cross in the upper right corner of all the filters allows to remove them by double-clicking the left mouse button. We are now going to see the rest of the filters that we can select.
Piece count
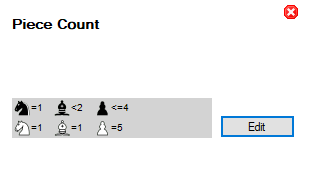
This filter allows you to define how many pieces of each color must be present on the board for the position to be selected. It is unnecessary to take into account all the pieces; we can search, for example, all the chess games with a single white rook and one or two black rooks in some position.
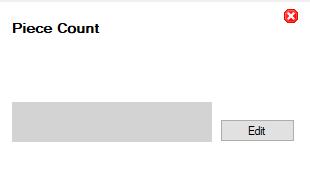
Pressing the Edit button will open the dialog box that allows you to set the piece count:

You can indicate whether you want to include a piece in the filter by checking the Use Filter checkbox for each one. You can configure the account by selecting one of the operators in the drop-down list and typing a number in the corresponding textbox. For instance, if you choose Different to and type a 3 in the pawn textbox, any position that does not have exactly 3 pawns will meet the filter. The In Range and Not in Range operators allow you to define a range between two values instead of just one; a semicolon must separate the two values (;), without spaces. For example, In Rank 2;5 means between 2 and 5 pieces. It is also possible to write a description of the filter if it has some special meaning that you want to remember.
Once you have set the configuration, you can exit using the OK button. The filter will display the selected account (in the image, the filter does not take into account the rooks nor the queens):
Position definition
With this filter, you can define pieces' arrangement on the complete board or a given rectangle of squares. The application will check this rectangle in all possible locations on the board.
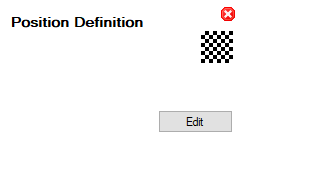
Pressing the Edit button will show the board where you can define the position:
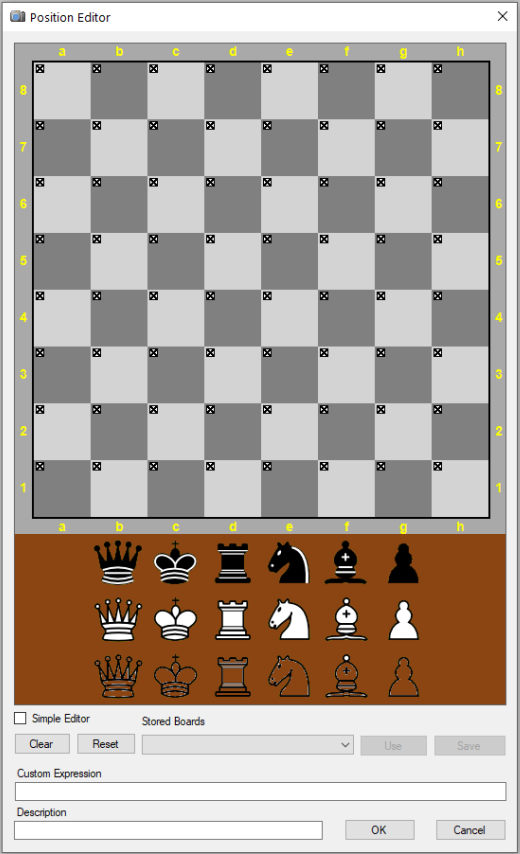
The squares on the board have a mark indicating which ones will be taken into account to define the position. Initially, all the squares are selected, but you can choose any rectangle on the board by clicking on the upper left square of it with the left mouse button and, without releasing the button, dragging the pointer to the lower right square of the selected area. It does not matter which area you select because all rectangles of the same size will be considered equal when looking for the position.
When you select the entire board, the colours of the squares cannot vary, but if you choose only a portion of the board, there are three possible colour combinations:

In the first one on the left, the squares are indifferent in colour; that is, the upper left corner can be a black or a white square. There is a specific squares configuration in the other two images, which reduces the number of different zones of the board in which they can be located. To set up this configuration, click on the upper left square with the right mouse button, and the following menu will show:
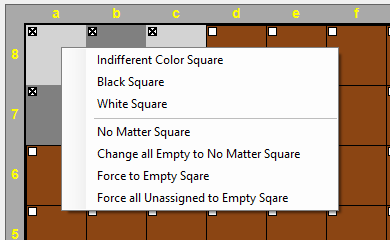
With the first three options, you can configure the entire selected rectangle with the three previous possibilities. The other four options are to change individual squares and only affect the one on which you have clicked to display the menu. An ignored square won't be taken into account when looking for the position, and it may be empty or contain any piece of any color. An empty square means that it must be void for the filter to be met. The symbol of the empty set indicates these empty squares. If a square appears without any symbol or piece, it is an ignored one. The other two options are to make it easier to mark empty squares or ignored squares in a single operation instead of one by one.
There are three rows of pieces at the bottom of the board: black, white, and without colour, indicating either a white or a black piece. You can place a piece on a specific square by clicking the left mouse button on the selected piece; the cursor will change to the icon of the piece, and you can place it on any square of the selection by clicking on this square. If you want to put more than one piece of the same type, it is unnecessary to select it again. By clicking twice on the same box, the cursor changes to its normal state. It is possible to place more than one piece on the same square; this means that in that square can be any piece from among those that you have put. Empty squares count as a piece in this sense. To remove the configuration of a square, you must use one of the square menu options.
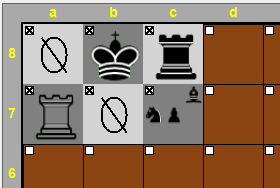
In the image, you can see a configuration of 3 x 2 squares. There are two empty squares, a black king and a black rook, a rook of indifferent colour, and a square with either a black pawn, knight, or bishop.
In the chess match filters, it is possible to create a filter containing several positions corresponding to different movements, for example, to define a specific opening. In this case, it can be very tedious to reposition all the pieces again and again to make only minimal changes. To avoid this, you can store several positions in memory to take each as a starting point for the next one you are going to define. To save the current position, you will have to write a description for it at the bottom of the dialog box and press the Save button on the right side of the drop-down list. The positions in this list will appear in this dialog box each time you edit a new position, so you can select and pass them from the drop-down list to the board by pressing the Use button. This way, you only have to change a few pieces to define the next position, and you can save this position again to continue the procedure on the next move. If you close the application, you will lose this list.
Two other buttons that can make the job easier are Clear, which will clear all the squares on the board, and Reset, which will place all the pieces in the starting position of a regular chess game.
The explanation above applies to defining complex or partial piece configurations. Suppose you want to set up a specific position that covers the entire board. In that case, you can use a more straightforward procedure to avoid complications, checking the Simple Editor check box below the board. When you use this editor, the empty squares are empty squares, and in each one, there can only be one piece, which you can place in the way explained above. There are no undefined colour pieces, only white or black ones. You cannot select squares; the whole board is always taken into account. There is also the option to save positions, as in the previous case.
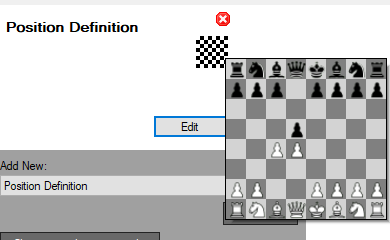
Once you have defined the position, you can see it in the filter editor by hovering the mouse pointer over the drawing of the board of each of the position filters, without having to open the editor:
In the next article in this series, I will continue explaining the rest of the movement filters, which are much simpler than this last one.
Until next time, thanks for reading!


