Training sparring robot III
This article is the last in the series dedicated to building the Octopussy martial arts and self-defence training sparring robot. Here, I will explain the use of the software to control the device, which allows you to design a virtually unlimited range of training routines within the robot's features. You can start from the first article in this series, in which you can download the executable and its source code, in case you want to make modifications to the software.
You have to install two different programs. You should upload one of them to the Arduino board. The other application is a Windows executable, with which you can program the robot. The first thing you have to do is to download the software to upload programs to Arduino boards from this link - if you don't already have it. In this link, you have a tutorial on that software if my instructions are not enough.
Once you have installed the Arduino software, connect the Arduino board to the computer using a USB cable. Wait for the drivers to be installed automatically and open the Devices and Printers option in Windows Control Panel. You will see a device called Arduino Mega, with the USB port name to which it is connected (for instance, COM4). Remember this port name because you will need it to configure the application (if you connect the board to another USB connector, this value may change).
Next, unzip the Octopussy executable and find the file octopussy.ino in the Arduino/octopussy subfolder. Open it with a double click. You will see something like this:
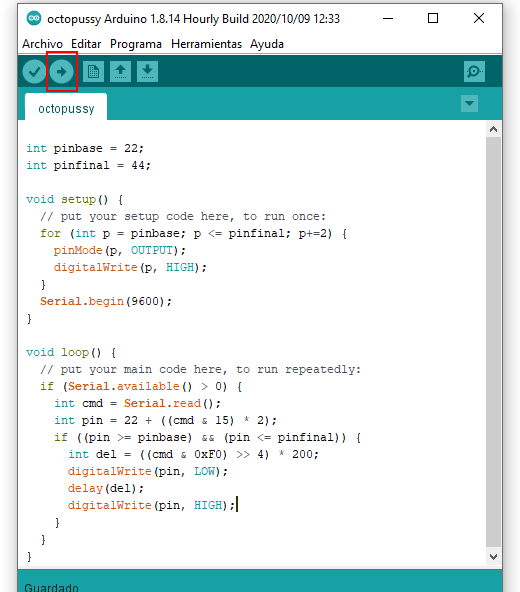
Open the Tools menu and drop down the option Board: to select Arduino Mega or Mega 2560. Next, drop down the option Port: and select the USB port where you have connected the Arduino board. Finally, press the button that I have marked in the image with a red box. The program will upload to the Arduino board. This done, the Arduino board will be ready to use; you no longer have to upload the program unless you modify the source code.
The robot control executable is Octopussy.exe. The application looks as follows:
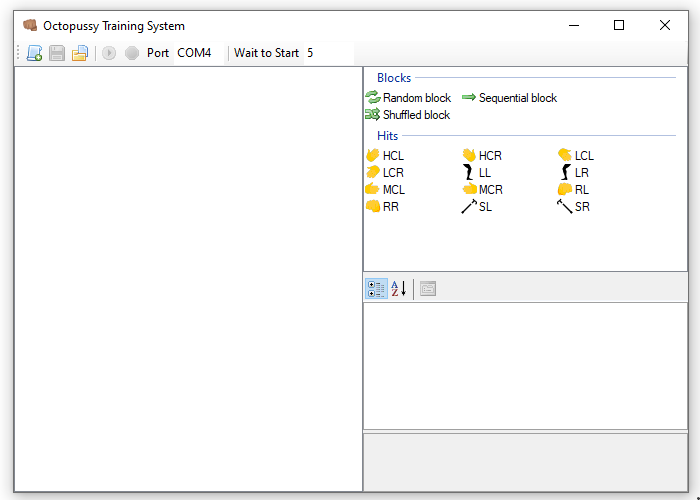
You have to change the Port text box value writing the one that corresponds to your installation. In the right panel, you have the two types of elements to define the programming: Blocks and Hits. The blocks can contain a list of hits and other blocks; they are of three types:
- Random block: only one of its elements will be executed, which will be chosen at random.
- Shuffled block: All its elements will be executed, but in random order.
- Sequential block: all its elements will be executed in order, starting from the first until the last.
First, select a block by clicking on it with the left mouse button and drag-drop it to the empty panel on the left:
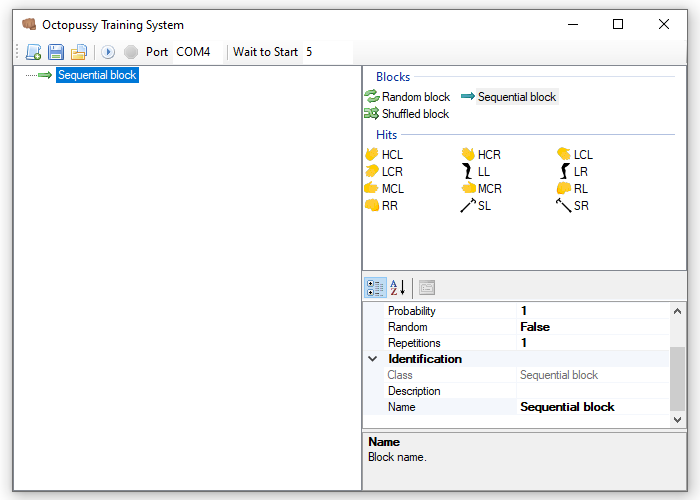
Below the hits box, you can see the configuration of the selected element, in this case, the block. The parameters are as follows: Continuous (not shown) is to choose if the block has to loop an infinite number of times (when the value is True. You can stop the loop using a button on the toolbar). In case you want it to run only a fixed number of times, the value must be False. Use the Repetitions parameter to indicate this number. The Random parameter is to configure that this number of repetitions will be random, between one and the value provided. The Probability parameter is for the probability of executing the block when it is within a random block. The value must be between 0 and 1, with decimals (for instance, 0.5 is for a probability of 50%). Make sure that the sum of the probabilities of all the elements into a random block is 1. Finally, you can provide a Name and Description for the block.
To add a hit to a block, first select the block in the right panel by clicking on it with the mouse. Next, select the hit in the left panel by clicking on it with the mouse and, finally, drag-drop it with the mouse over the left panel:
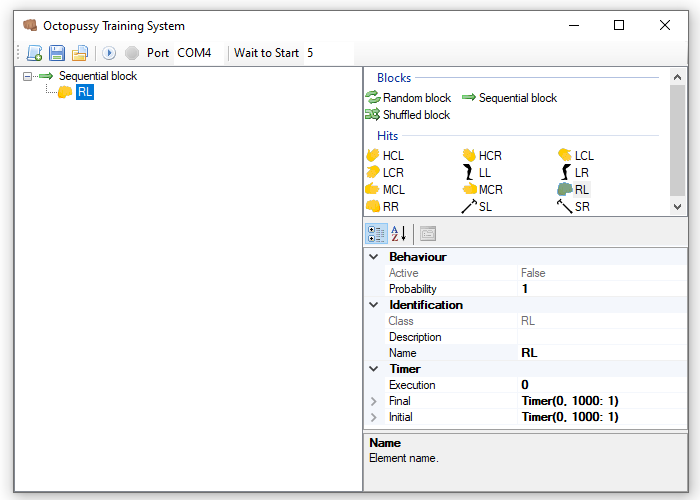
You can see the configuration parameters clicking on the hit. The Probability parameter is like that of blocks. It is only taken into account when the block containing the hit is a random one. The Execution parameter is the time to activate the motor for the blow. Each unit represents 200 milliseconds, so a value of five is one second and a value between two and three, approximately half a second. Usually, this will be the range of values you put on (the maximum is 15, which is for three seconds). The blows are fast; one second will be too much in most cases.
The Initial and Final parameters are to set a delay before and/or after hitting, so that the robot doesn't strike too fast. To configure them, you have to expand them:
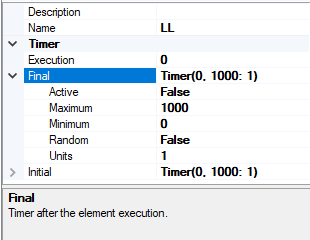
Activate the delay with the Active parameter. The Maximum parameter is the number of milliseconds to wait (one second is 1000 milliseconds). If you activate the Random parameter, you have to provide a minimum and a maximum value. The robot will wait for a random number of milliseconds between these two values. The Units parameter changes the number of milliseconds for each unit in the Minimum and Maximum parameter values.
To delete an element or move it up or down, you have first to select the element and then click the right mouse button to display a menu:
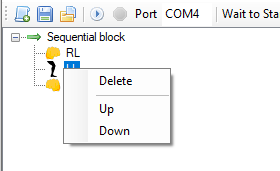
Beware of the delete option. The program has no undo option.
The controls on the toolbar are as follows, from left to right:
- Create a new program: erase everything to start from scratch.
- Save: Save the program to disk.
- Open: Load a previously saved program.
- Run: execute the currently selected item. You can test individual hits or blocks without having to run the entire program.
- Stop: halt the execution.
- Port: write the USB port where the Arduino is connected.
- Wait to Start: number of seconds to wait before running the program, for you to have time to place yourself before the device.
This is all you have to know about the assembly and programming of the robot. I hope you have a good time building it and training - those who dare to do it. Until next time, thanks for reading!


