Using the Dropbox API from a Xamarin Forms PCL App
Dropbox is one of the most popular applications for sharing and storing files in the cloud. In a desktop computer it is very easy to use it, since it is integrated into the file system and the folders are just like any other folder in the system, so that they can be managed using the usual file management API. From a mobile device, however, it is necessary to use the Dropbox API to manage and access the files. In this article I will show you how to use it in a PCL Xamarin Forms application.
In the examples, I will use the CSharp language and the Dropbox.api class library, which can be installed from the NuGet package manager.
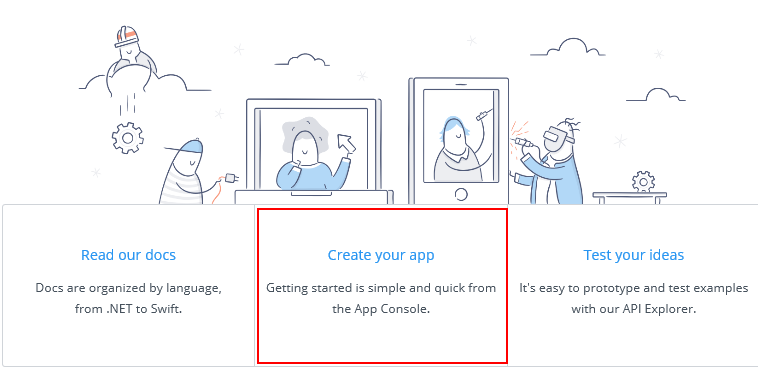
The first thing to do is to register our application on the Dropbox platform. To do this, go to the Dropbox site for developers and select the Create your app option:

Next, we have to select the type of API that we want to use with the application. The usual option is to use the free Dropbox API:

The second step is to select the access mode. We can restrict the access of the application to a single folder or allow access to all folders:

Finally, we must enter a name for the application. Not all the names are valid; there are some rules to build them that can be found in this same web. If you enter an invalid name, a link to the page with the rules will appear.

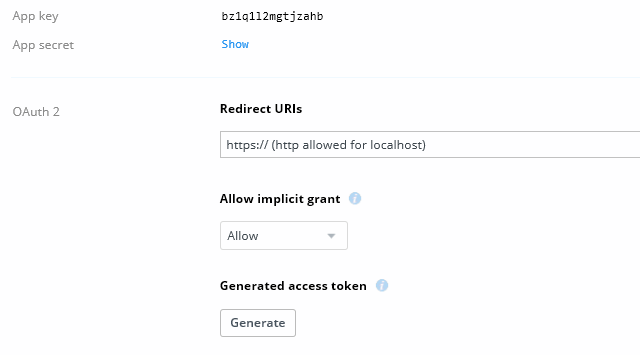
Pressing the Create app button will display the page with the application settings. The information you need is in the keys section:

The key we will use to connect is the OAuth2 access token. In order to generate one, press the Generate button, below Generated access token:

You only have to copy this token and use it in the client to stablish the connection. Let's assume that we have stored this key in a string variable or constant named _accessKey. The way to create a client to connect with the Dropbox API is very simple, the class is DropboxClient:
DropboxClient client = new DropboxClient(_accessKey)
Listing files
One of the first operations that we can perform once the connection is established is to obtain a list of files. The API uses asynchronous calls, which can be performed using the async / await programming. The method used for listing the contents of a folder is ListFolderAsync, with the following arguments:
- path: the folder path. The usual url format is used. You can pass an empty string to list the root folder or a string with a subfolder path, such as /subfolder/...
- recursive: defaults to false, is used to list subfolders recursively.
- includeMediaInfo: defaults to false. Used to return metadata for image and video files.
- includeDeleted: defaults to false, set it to true if you want include files that have been deleted.
- includeHasExplicitSharedMember: defaults to false, provides additional information in metadata.
These parameters can also be passed encapsulated in a ListFolderArg object.
The listing is obtained in one or several pages, depending on the number of files and folders to list. The method returns a ListFolderResult object, which in turn has a HasMore property that indicates if there are more files in the list. If so, to continue with the list you must use the ListFolderContinueAsync method.
The Entries property of the ListFolderResult object is used to list the objects contained in the list. For each of them you can check the IsFile, IsFolder or IsDeleted properties to determine the object type.
This would be, for example, the code to use to list the files in the root folder:
using (DropboxClient client = new DropboxClient(_accessKey))
{
    try
    {
        bool more = true;
        var list = await client.Files.ListFolderAsync("");
        while (more)
        {
            foreach (var item in list.Entries.Where(i => i.IsFile))
            {
                // Process the file
            }
            more = list.HasMore;
            if (more)
            {
                list = await client.Files.ListFolderContinueAsync(list.Cursor);
            }
        }
    }
    catch
    {
        // Process the exception
    }
}
Uploading and downloading files
Uploading files to the cloud or downloading them from there is easy with the UploadAsync and DownloadAsync methods. You can use a generic Stream object to pass the contents of the files. For example, this could be the code to download a file:
public async Task DownloadFile(string filename, Stream s)
{
    using (DropboxClient client = new DropboxClient(_accessKey))
    {
        IDownloadResponse<FileMetadata> resp =
            await client.Files.DownloadAsync(filename);
        Stream ds = await resp.GetContentAsStreamAsync();
        await ds.CopyToAsync(s);
        ds.Dispose();
    }
}
Remember that the file name can contain a path and that it must have a url format, so it must always start with the / character.
To upload the files, if they are smaller than 150MB, you can use the UploadAsync method. Here the parameters are somewhat more complicated. On the one hand, there is the WriteMode class, which indicates whether you want to add, overwrite or update a file, using the boolean properties IsAdd, IsOverwrite, and IsUpdate. With the CommitInfo class you can group the parameters by passing them in the constructor:
- path: text string with the path and filename.
- mode: defaults to null, a WriteMode object.
- autorename: defaults to false. Indicates whether the file should be renamed automatically in case of conflict.
- clientModified: defaults to null. It is a DateTime? object to indicate the date of modification of the file.
- mute: defaults to false. It is used to disable Dropbox client notifications.
As in the previous case, you can use a generic Stream to upload the file, for example:
public async Task UploadFile(string filename, Stream s)
{
    using (DropboxClient client = new DropboxClient(_accessKey))
    {
        CommitInfo ci = new CommitInfo(filename);
        FileMetadata resp = await client.Files.UploadAsync(ci, s);
    }
}
The FileMetadata object returned contains all the information about the file.
For files larger than 150MB, or to upload a file in multiple steps, a session must be started with the UploadSessionStartAsync method. Each portion of the file is written using the UploadSessionAppendV2Async method, and, to finish, you have to use the UploadSessionFinishAsync method. Here is the scheme to follow:
// With this variable w ego indicating the position
// of the next part of the archive to upload

ulong offset = 0;

// Start the session, you can call it without arguments, or write the
// first portion of the file passing a Stream in s

UploadSessionStartResult resp = await client.Files.UploadSessionStartAsync(false,s);

// Create a cursor for the next operations

UploadSessionCursor cur = new UploadSessionCursor(resp.SessionId, offset);

// For each new portion of the file, we use this call
// s is a Stream with the data

UploadSessionAppendArg aarg = new UploadSessionAppendArg(cur);
await client.Files.UploadSessionAppendV2Async(aarg, s);

// To end, give a name to the file and end the session

CommitInfo ci = new CommitInfo(filename);
UploadSessionFinishArg farg = new UploadSessionFinishArg(cur, ci);
await client.Files.UploadSessionFinishAsync(farg, s);
Delete files
Finally, to delete a file you can use the DeleteAsync method; for example in the following way:
public async Task DeleteFile(string filename)
{
    using (DropboxClient client = new DropboxClient(_accessKey))
    {
        await client.Files.DeleteAsync(filename);
    }
}
And that's all about the basic methods to access the files. There are many other methods and classes in the library that you can found in the Dropbox.api documentation.


It worked perfectly, but how do I upload the upload to the user's account using my app? that is, it authenticates in the account it and send to the account it?
If you want to upload something to any user account, you must be identified in that account, i.e. you need the user credentials. Otherwise, anyone could access private information of another user.