Multitasking IV, interacting with Windows UI
So far I have shown examples of multitasking that block the application until they finished. This is not very useful in practice. Usually, we want that the user can continue interacting with the application while the tasks are running in the background; we could want also for the threads to interact with the user interface.
If you want to start at the beginning, this is the first article in the series about multithreaded applications.
In this link you can download the MultithreadingDemo application source code with the examples, written in csharp with Visual Studio 2015. The application uses version 4.5 of the .NET Framework.
The Windows user interface runs on its own task. If we try to change the value of a property of a control or call certain methods from another task, an exception will be thrown. But there are mechanisms that allow us to perform this interaction quite easily.
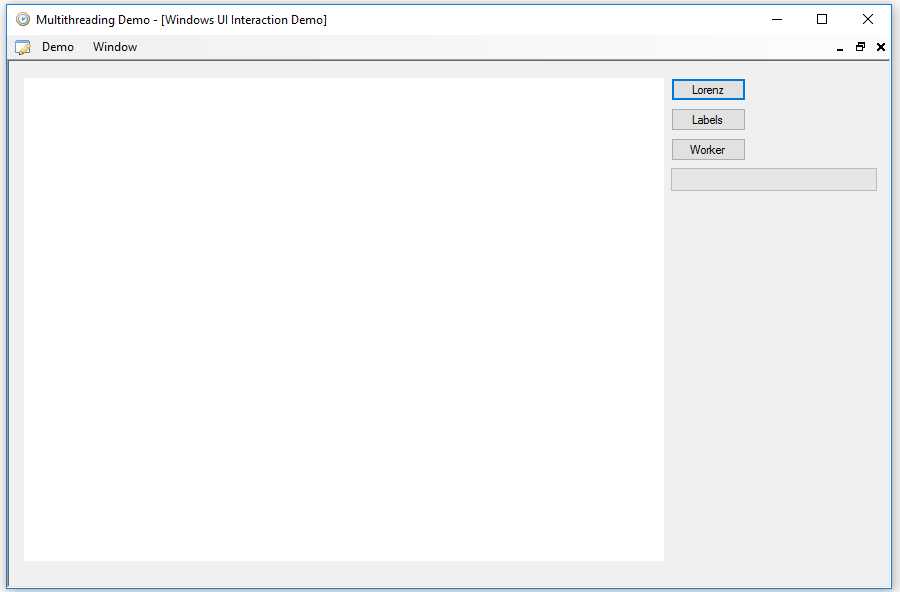
To see the examples that accompany this article, in the MultithreadingDemo application you can access the Windows UI option from the Demo menu:

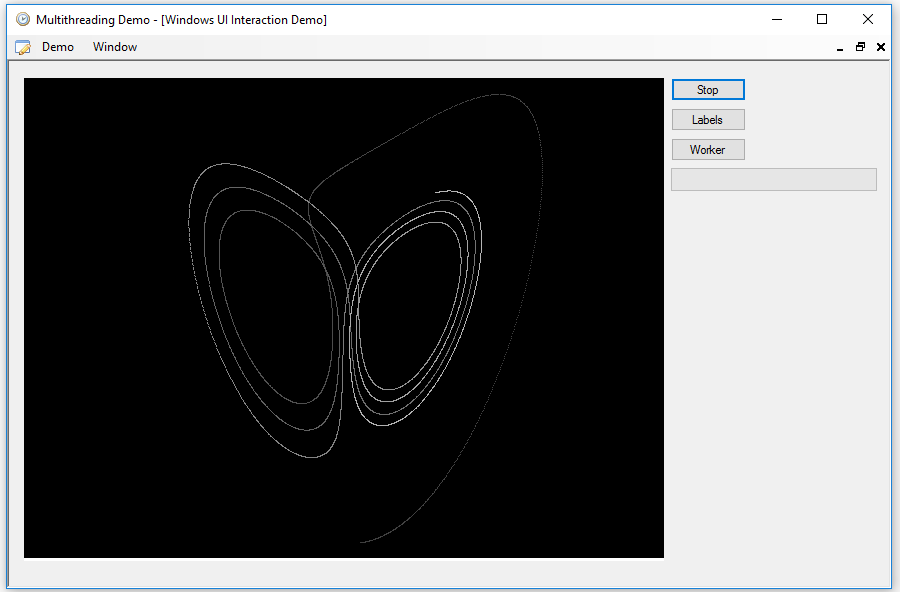
In the first example that I'm going to show, we will draw again the Lorenz attractor, but this time watching how the attractor is being drawn, while we can continue interacting with the program. To do this, press the Lorenz button, whose text will change to Stop when the drawing starts. Pressing the button again, the task will end:

In this case we launch only a task using the Task class, and we will use a CancellationTokenSource object to be able to stop it when we want. With a Barrier object we will wait for the task to finish completely before destroying the objects so that no exceptions are thrown:
if (bLorenz.Text == "Lorenz")
{
    _barrier = new Barrier(1);
    _bitmap = new Bitmap(640, 480);
    Graphics gr = Graphics.FromImage(_bitmap);
    gr.FillRectangle(Brushes.Black, new Rectangle(0, 0, 640, 480));
    pbDrawing.Image = _bitmap.Clone() as Bitmap;
    pbDrawing.BringToFront();
    _cancel = new CancellationTokenSource();
    _lTask = Task.Run(() =>
    {
        Lorenz();
    }, _cancel.Token);
}
else
{
    try
    {
        _cancel.Cancel();
        _barrier.SignalAndWait();
        bLorenz.Text = "Lorenz";
        Thread.Sleep(1000);
    }
    catch (Exception ex)
    {
        MessageBox.Show(ex.Message);
    }
    finally
    {
        _cancel.Dispose();
        _lTask.Dispose();
        _barrier.Dispose();
    }
}
The _bitmap object will be used to draw the attractor, but as we cannot use it while it is assigned to the Image property of the PictureBox, or an exception will occur, we will have to make copies with the Clone method and assign them one by one. This is the task code:
private void Lorenz()
{
    _barrier.AddParticipant();
    bLorenz.EndInvoke(bLorenz.BeginInvoke((Action)(() =>
        { bLorenz.Text = "Stop"; })));
    int ix = 0;
    double x = 1;
    double y = 1;
    double z = 1;
    double dx, dy, dz;
    double dt = 0.001;
    bool done = true;
    try
    {
        while (true)
        {
            if (done)
            {
                done = false;
                dx = 10 * (y - x);
                dy = x * (17 - z) - y;
                dz = x * y - z;
                x += dt * dx;
                y += dt * dy;
                z += dt * dz;
                int xx = (int)(x * 16 + 320);
                int yy = 480 - (int)(z * 16);
                int c = 63 + ix / 100;
                Color color = Color.FromArgb(c, c, c);
                _bitmap.SetPixel(xx, yy, color);
                pbDrawing.BeginInvoke((Action)(() =>
                    { pbDrawing.Image = _bitmap.Clone() as Bitmap;
                        done = true; }));
                ix++;
                if (ix > 19200)
                {
                    ix = 0;
                }
            }
            _cancel.Token.ThrowIfCancellationRequested();
        }
    }
    catch
    {
        _barrier.SignalAndWait();
    }
}
The Barrier object is created with a count of 1, for the main task. The first thing we do when we enter the task is to increase the account with the AddParticpant method, so we have the barrier ready to synchronize two tasks.
Next, we change the text of the button to Stop, but since the button belongs to the main task, the one of the Windows user interface, we cannot do it directly from here. For that, the controls have a BeginInvoke method that allows executing a delegate in the context of the task that owns the control, and it is in this delegate where we will make the change. With the EndInvoke method we can wait for the completion of this operation before continuing.
Within the loop we will also have to use BeginInvoke to assign the copy of the image to the PictureBox control, but in this case we have two problems. On the one hand, the loop can be executing very quickly and, when we get back to the SetPixel call, the Clone method in the delegate could hasn't finished, which would raise an exception. We cannot use EndInvoke, because the program could get blocked when canceling the task, so we have to implement some synchronization mechanism.
It is not a good solution to use some kind of sync methods, such as lock or Monitor, but it is not always necessary to use these mechanisms. In this case we are going to use a simple local bool variable, since in the delegate we can access these variables without problems It will indicate when the Clone method is finished and, so, we can continue with the drawing.
Instead of checking the IsCancellationRequested property of CancellationToken in the loop, we will use the ThrowIfCancellationRequested method, which produces an exception in case of cancellation. In the catch block we will indicate that the task has ended with the SignalAndWait method of the Barrier object.
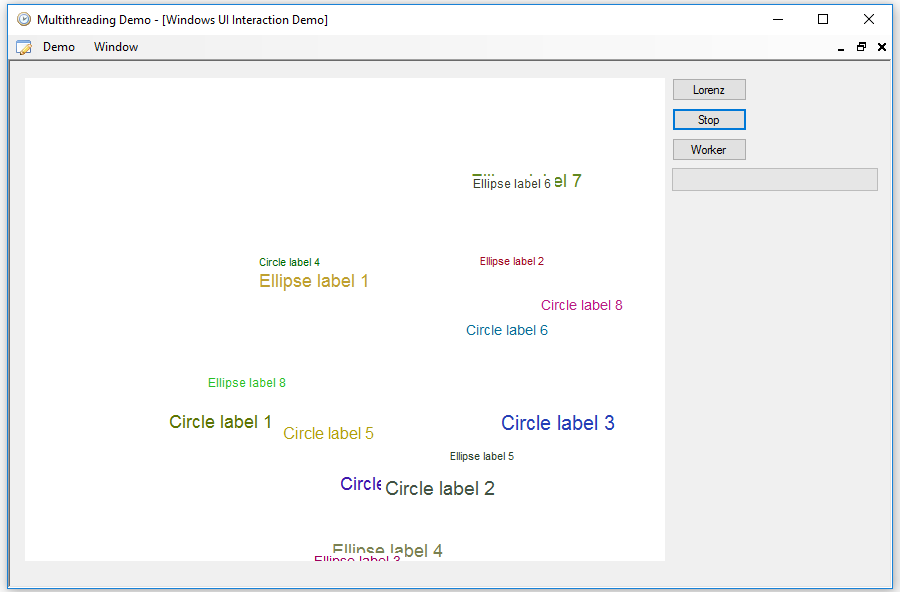
Now let's see a similar example with more tasks involved. In this case, each task will add a Label control with a different color and font size to a Panel control and rotate it following a circle or an ellipse with a random radius and direction. To execute it, you have to press the Labels button. This is the code that launches or cancels the tasks:
if (bLabels.Text == "Labels")
{
    pLabels.Controls.Clear();
    pLabels.BringToFront();
    _cancel = new CancellationTokenSource();
    _barrier = new Barrier(1);
    _lTasks.Clear();
    for (int ix = 1; ix <= 8; ix++)
    {
        int c = ix;
        _lTasks.Add(Task.Run(() =>
        {
            LabelCircle(100 + NextRandom(50),
                320 + (50 - NextRandom(100)),
                240 + (50 - NextRandom(100)),
                Math.Sign(50 - NextRandom(100)),
                "Circle label " + c.ToString());
        }, _cancel.Token));
        _lTasks.Add(Task.Run(() =>
        {
            LabelEllipse(100 + NextRandom(100),
                100 + NextRandom(100),
                320 + (50 - NextRandom(100)),
                240 + (50 - NextRandom(100)),
                Math.Sign(50 - NextRandom(100)),
                "Ellipse label " + c.ToString());
        }, _cancel.Token));
    }
    bLabels.Text = "Wait...";
}
else
{
    if (_barrier.ParticipantCount == 17)
    {
        try
        {
            _cancel.Cancel();
            bLabels.Text = "Labels";
            _barrier.SignalAndWait();
            Thread.Sleep(1000);
        }
        catch (Exception ex)
        {
            MessageBox.Show(ex.Message);
        }
        finally
        {
            _cancel.Dispose();
            _barrier.Dispose();
            foreach (Task t in _lTasks)
            {
                t.Dispose();
            }
        }
    }
}
In this case we will launch 16 tasks, eight of which will draw circles and the other eight ellipses. The tasks take a while to start, so the text of the button will change to Wait... until all of them have started. The Barrier object will have to reach an account of 17 at the end, and before that, the operation will not be allowed to be canceled, although the user interface will continue to respond.
This is the code of the task that moves a label in circles. The elliptical one is almost identical:
private void LabelCircle(double r, double xc, double yc, int dir, string text)
{
    _barrier.AddParticipant();
    if (_barrier.ParticipantCount == 17)
    {
        bLabels.BeginInvoke((Action)(() =>
            { bLabels.Text = "Stop"; }));
    }
    Label label = new Label();
    label.Text = text;
    label.AutoSize = true;
    label.Font = new Font("Arial", 8f + NextRandom(8));
    label.ForeColor = Color.FromArgb(NextRandom(192),
        NextRandom(192),
        NextRandom(192));
    label.BackColor = Color.Transparent;
    double angle = 0;
    int ixlabel = 0;
    lock (_lockObj)
    {
        ixlabel = pLabels.Controls.Count;
        pLabels.EndInvoke(pLabels.BeginInvoke((Action)(() =>
            { pLabels.Controls.Add(label); })));
    }
    try
    {
        while (true)
        {
            pLabels.Controls[ixlabel].BeginInvoke((Action)(() =>
            {
                pLabels.Controls[ixlabel].Left =
                   (int)(xc + r * Math.Cos(angle));
                pLabels.Controls[ixlabel].Top =
                   (int)(yc + r * Math.Sin(angle));
            }));
            Thread.Sleep(100);
            angle += 0.1 * dir;
            if (angle > 2 * Math.PI)
            {
                angle = 0;
            }
            else if (angle < 0)
            {
                angle = 2 * Math.PI;
            }
            _cancel.Token.ThrowIfCancellationRequested();
        }
    }
    catch
    {
        _barrier.SignalAndWait();
    }
}
Here we use the lock statement to make sure that two tasks do not add the Label control to the panel at the same time, to avoid exceptions and, at same time, to make sure we know the correct Label index in the Panel's Controls collection. Apart of that, everything is as in the previous example. Here we do not have to worry about any extra synchronization, since each task moves a different Label control.
The result is something like this:

To end, in the System.ComponentModel namespace, there is the BackgroundWorker component, which can be used in the forms to add an interactive background task in a simple way. You can find it in the toolbox, in the components section. This component has two important bool properties: WorkerReportProgress, which allows activate or deactivate the functionality of providing information on the progress of the task, and WorkerSupportsCancellation, which allows activate or deactivate the option of canceling the task.
This component has only three events defined. DoWork is the event where the background task is done, ProgressChanged is an event that is triggered when it is necessary to report the task progress, and RunWorkerCompleted is triggered when the task has finished.
We will see the operation of this component with an example that draws a fractal using the Newton's method to find roots of the complex function F(z) = Zn - 1. The task progress will be shown using a ProgressBar control, and You can cancel it, as in the previous examples. To execute it, just press the Worker button:
if (bWorker.Text == "Worker")
{
    _bitmap = new Bitmap(640, 480);
    Graphics gr = Graphics.FromImage(_bitmap);
    gr.FillRectangle(Brushes.Black, new Rectangle(0, 0, 640, 480));
    pbDrawing.Image = _bitmap.Clone() as Bitmap;
    pbDrawing.BringToFront();
    _iBitmap = new int[640 * 480];
    BitmapData bd = _bitmap.LockBits(new Rectangle(0, 0, 640, 480),
        ImageLockMode.ReadWrite,
        PixelFormat.Format32bppRgb);
    Marshal.Copy(bd.Scan0, _iBitmap, 0, _iBitmap.Length);
    _bitmap.UnlockBits(bd);
    bwNewton.RunWorkerAsync();
    bWorker.Text = "Stop";
}
else
{
    bwNewton.CancelAsync();
}
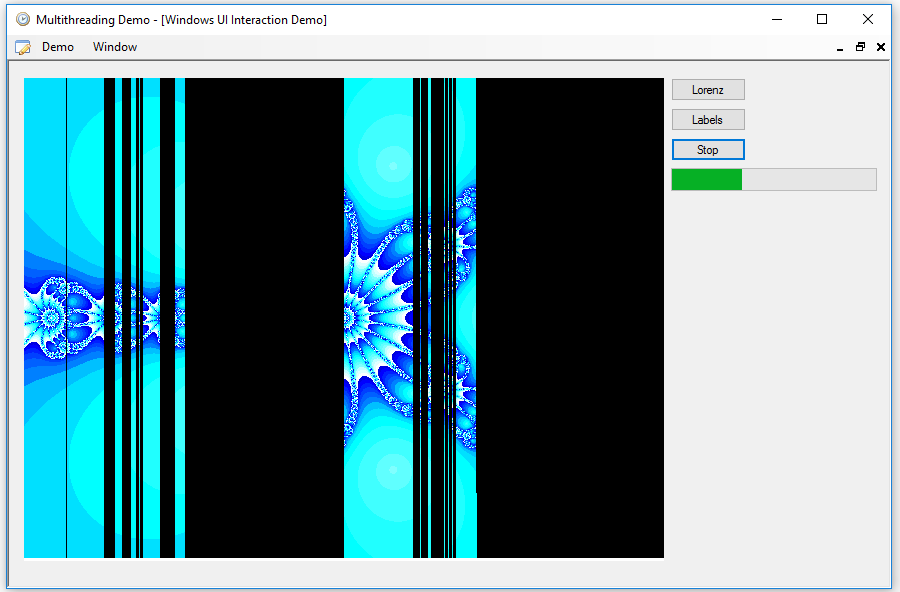
Instead of directly using a Bitamp object to draw the result, we will use the _iBitmap integer array to speed up the process, since the SetPixel method is very slow. The only thing we have to do to start the background task, is to use the RunWorkerAsync method, which in turn will trigger the DoWork event of the BackgroundWorker component. We will see how the image is formed while the ProgressBar control under the button will show the progress of the task, as in this image:

The DoWork event executes the following code:
private void bwNewton_DoWork(object sender, DoWorkEventArgs e)
{
    Complex c;
    double n = 5;
    double xmin = -2;
    double xmax = 2;
    double ymin = -1.5;
    double ymax = 1.5;
    double xi = (xmax - xmin) / 639;
    double yi = (ymax - ymin) / 479;
    int cp = 1;
    Parallel.For(0, 640, p =>
    {
        for (int q = 0; q < 480; q++)
        {
            c = new Complex(xmin + (p * xi), ymin + (q * yi));
            Complex x = c;
            Complex epsilon;
            for (int k = 1; k <= 400; k++)
            {
                if (bwNewton.CancellationPending)
                {
                    e.Cancel = true;
                    return;
                }
                epsilon = -((Complex.Pow(x, n) - 1) /
                    (n * Complex.Pow(x, n - 1)));
                x += epsilon;
                if (Math.Pow(epsilon.Magnitude, 2) < 0.00000000001)
                {
                    _iBitmap[p + 640 * (479 - q)] =
                        _colors[k % _colors.Length].ToArgb();
                    break;
                }
            }
            cp++;
            if (cp >= 3072)
            {
                bwNewton.ReportProgress(0);
                cp = 1;
            }
        }
        lock (_lockObj)
        {
            BitmapData bd = _bitmap.LockBits(new Rectangle(0, 0, 640, 480),
                ImageLockMode.ReadWrite,
                PixelFormat.Format32bppRgb);
            Marshal.Copy(_iBitmap, 0, bd.Scan0, _iBitmap.Length);
            _bitmap.UnlockBits(bd);
            Bitmap bmp = _bitmap.Clone() as Bitmap;
            pbDrawing.BeginInvoke((Action)(() =>
                { pbDrawing.Image = bmp; }));
        }
    });
}
In order to accelerate the calculations we use a Parallel.For loop to process each column of points separately, as in this case the color of each pixel is independent of the others. You can see that the columns are drawn in a random order, as we saw in the first article in the series. The Parallel.For loop can only be used when the order in which the different iterations are executed, as in this case, does not matter.
To cancel the job, the CancelAsync method of the BackgroundWorker component is used. From inside the task, you have to check the CancellationPending Boolean property. The DoWorkEventArgs argument of the event has three properties: Argument, of type object, allows passing data to the task, Cancel allows indicating that the task has been canceled to the RunWorkerCompleted event, and Result, another object, allows the task to return a result.
With the ReportProgress method, the ProgressChanged event is triggered, which is executed in the context of the user interface task, thus we can access all the controls of the form without problems. This method has a parameter in which we can provide the percentage of completed work, although in this case I do not use it.
The PorgressChanged event simply increments in one the value of the ProgressBar:
private void bwNewton_ProgressChanged(object sender,
    ProgressChangedEventArgs e)
{
    pbWorker.PerformStep();
}
The ProgressPercentage property of the ProgressChangedEventArgs parameter contains the percentage of work performed, if used.
When the task is finished, the RunWorkerCompleted event is triggered:
private void bwNewton_RunWorkerCompleted(object sender,
    RunWorkerCompletedEventArgs e)
{
    bWorker.Text = "Worker";
    pbWorker.Value = 0;
    if (e.Error != null)
    {
        MessageBox.Show(e.Error.Message);
    }
    else if (e.Cancelled)
    {
        MessageBox.Show("Worker cancelled");
    }
}
The Error property of the RunWorkerCompletedEventArgs parameter contains an Exception object if the job has finished due to an exception, while the Cancelled property indicates if the job was canceled, provided that we have indicated it within the task code. The Result property will contain the result returned by the task, if any.
And that's all for now. In the following article I will show a simplified method to organize several tasks by using async and await.


