Multitasking III, concurrent access
In multitasking applications there is a problem when concurrent access to resources, such as files or memory, when you launch several tasks at once. Two tasks cannot write at the same time in the same memory address, it is required to make sure that some data is not modified while we are reading them or things like that. In this article I will review the tools provided by .NET Framework to deal with these issues.
If you want to start at the beginning, this is the first article in the series about multithreaded applications.
In this link you can download the MultithreadingDemo application source code with the examples, written in csharp with Visual Studio 2015. The application uses version 4.5 of the .NET Framework.
All the classes used in this article are in the System.Threading namespace. In the MultithreadingDemo application, you can open the form with the examples using the Concurrency option in the Demo menu.

The first problem that can arise is when several tasks need to modify the value of the same variable. We need a mechanism that allows only one of them to do it, and any other that want to do it at same time be blocked. Otherwise, an exception would occur. This goal can be achieved with a statement of the C# language, the lock one. To use it, we need a common object to all the tasks that compete for the resource. In this case we will use a private static variable of the form, of type string:
private static string _lockStr = "";
This statement encloses a block of code, which constitutes what is known as a critical section. When a task obtains access to the statements that contain this critical section, the rest of the tasks that try to access it will be blocked in the lock statement, until the block is abandoned by the current task.
As an example, let's calculate an integral using a well-known numerical method. We will calculate the approximate probability of obtaining a value lower than a given one in a normal distribution with a given mean and standard deviatio. To do this, we will integrate the density function of that distribution between minus infinity and the given value, which is equivalent to making a sum of a large number of values that this function takes in that interval (obviously, we cannot count from minus infinity, so we will start counting from 6 times the standard deviation to the left of the mean).
Since the sum is a commutative operation, we can divide the interval into several parts and add the values of the sum of each in a separate task, but we will need to have exclusive access to the variable that contains the total sum each time we have to add one of the partial sums, for this we will use the critical region created by the lock statement.
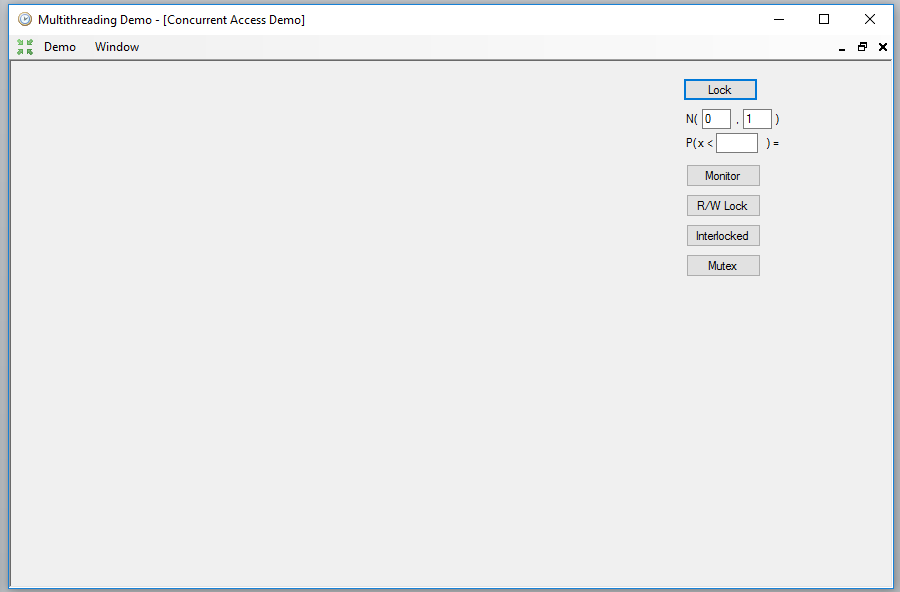
In the form, below the Lock button, we have to write a value for the mean and the standard deviation next to the N label, and a value to calculate the probability next to the P label. This is the code that performs the calculations:
double result = 0;
double gamma = 1.0 / (Math.Sqrt(2.0 * Math.PI));
double den = 2.0;
double h = (((p - mean) / sd) + 6) / 1000000;
double h3 = h / 3.0;

Parallel.For(0, 10, (ip) =>
{
    double ig = 0;
    for (int ix = ip * 100000;
        ix < (ip < 9 ? 0 : 1) + ((1 + ip) * 100000); ix += 2)
    {
        double xn0 = Math.Round(-6 + ix * h, 10);
        double xn1 = Math.Round(-6 + (ix + 1) * h, 10);
        double xn2 = Math.Round(-6 + (ix + 2) * h, 10);
        ig += Math.Round(h3 * ((Math.Exp(-Math.Pow(xn0, 2) / den)) +
            (4 * (Math.Exp(-Math.Pow(xn1, 2) / den))) +
            (Math.Exp(-Math.Pow(xn2, 2) / den))), 10);
    }
    lock (_lockStr)
    {
        result += ig;
    }
});
lResult.Text = ") = " + Math.Round(gamma * result, 5).ToString();
As you can see, we will sum 1000000 values of the function, using 10 tasks that will calculate 10000 values each, using a Parallel.For loop. The lock block contains only one statement, but it could contain any number of them. When they finished, the probability obtained will appear to the right of the P label.
Being an statement of the language, lock provides a quick mechanism to obtain a mutual exclusion, but there is also a class that allows to do the same, providing additional control mechanisms, such as the possibility of trying to obtain the lock and, if it is not possible, continue with another type of work, or pass control to another task in the middle of the critical section, without having abandoned it, to continue later when the other task has finished. It is the Monitor class.
This class only has static methods and its use is like that of the lock statement, although in this case we must enclose the critical section between a call to the Enter method and another to the Exit method. The critical section must be included in a try block after calling the Enter method, and the call to the Exit method must be placed in a finally block to ensure that it will be called in any case. Both functions receive the same variable as parameter, which must be common to all the tasks involved and, as in the case of the lock statement, of type object or a derived type.
In this case, we will calculate the average size of the files in the subdirectories of a given directory, and save the values in a text file. To do that, we will use the calcHelper auxiliary class, defined as follows:
private class calcHelper
{
    public long _size;
    public int _count;
    public long Mean
    {
        get
        {
            return _size / _count;
        }
    }
}
This class contains the number of files and the sum of their sizes, plus a function to calculate the average size. We will define a global variable of type Dictionary<string, calcHelper>, whose key will be each of the subdirectories contained directly in the chosen directory, within each of which we will calculate the average size of all the files contained in that subdirectory and all its internal subdirectories tree. When finished, we will write the results in a text file and then open it with the notepad.
In the Click event of the Monitor button, you have to select first the directory, and then a text file to write the results. Then, the subdirectories of the chosen directory are listed and a task is launched to perform the calculations on each one of them with Task.Run.
if (fbDlg.ShowDialog() == DialogResult.OK)
{
    if (sfDlg.ShowDialog() == DialogResult.OK)
    {
        foreach (string d in
            Directory.EnumerateDirectories(fbDlg.SelectedPath))
        {
            string dir = d;
            _calculations[dir] = new calcHelper();
            tlist.Add(Task.Run(() => { CalculateThread(dir); }));
        }
        Task.WaitAll(tlist.ToArray());
        StreamWriter wr = new StreamWriter(sfDlg.FileName);
        foreach (string k in _calculations.Keys)
        {
            if (_calculations[k]._count > 0)
            {
                wr.WriteLine(string.Format("{0}: {1}", k,
                    _calculations[k].Mean));
            }
        }
        wr.Close();
        Process p = new Process();
        p.StartInfo.FileName = "notepad";
        p.StartInfo.Arguments = sfDlg.FileName;
        p.Start();
    }
}
When all the tasks have finished, the results are written to the file and the notepad is launched to show it. The class we use to run another application is Process, defined in the System.Diagnostics namespace. Its StartInfo property contains members where we must give the name of the executable, FileName, and the arguments that we want to pass to it, Arguments. In this case, the name of the text file. With the Start method the application will finally be launched.
The Monitor class will be used within the method that implements the tasks, CalculateThread, to prevent more than one task from accessing at the same time the dictionary that contains the calculations. You must prevent two different tasks from modifying a collection at once, or an exception may occur.
private void CalculateThread(string dir)
{
    long sz = 0;
    int cnt = 0;
    foreach (string f in Directory.EnumerateFiles(dir))
    {
        FileInfo fi = new FileInfo(f);
        sz += fi.Length;
        cnt++;
    }
    Monitor.Enter(_lockStr);
    try
    {
        foreach (string basedir in _calculations.Keys)
        {
            if (dir.StartsWith(basedir))
            {
                _calculations[basedir]._count += cnt;
                _calculations[basedir]._size += sz;
                break;
            }
        }
    }
    finally
    {
        Monitor.Exit(_lockStr);
    }
    foreach (string sdir in Directory.EnumerateDirectories(dir))
    {
        CalculateThread(sdir);
    }
}
Sometimes there are many readers using the same resource, but few write operations. In these cases we may be interested in allowing several tasks to read the data simultaneously without changing it, but being able to block access to all tasks except one when a value must be changed. For this there is the ReaderWriterLock class. This class is used similarly to the Monitor one, but allowing access to data in read or write mode. In reading mode, any number of tasks can read the data. When one of these tasks needs to make a change, it must request access in write mode. While there are tasks that have obtained access to the resource for reading or writing, this task will be blocked. When you finally get access to writing, all the tasks that try to get read or write access will be blocked, and so on.
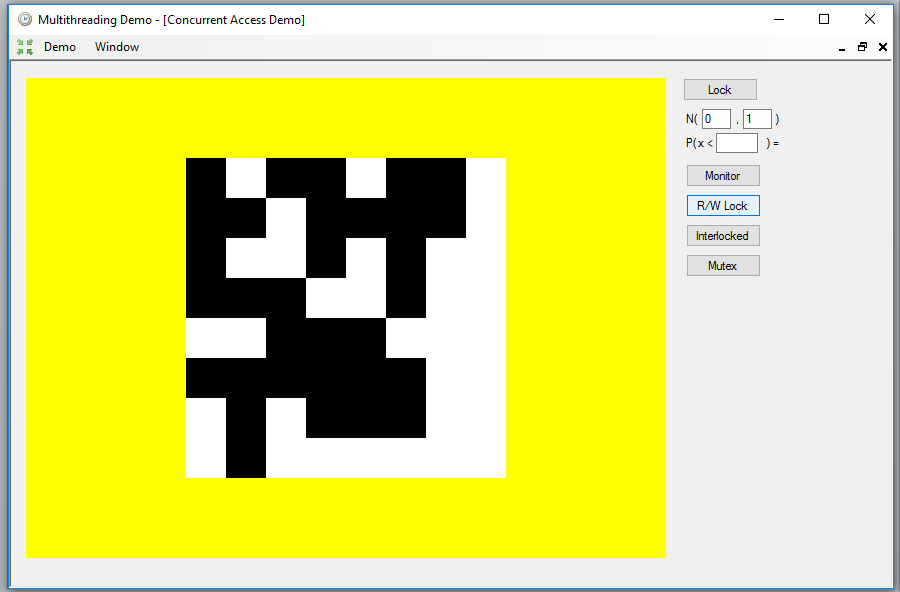
The example that I am going to show to use this class consists in ordering the disordered squares of a chessboard. To do this, we will first generate a randomly disordered board, using the R/W Lock button:

Next, we will launch three tasks using Task.Run, one to sort the cells in the rows, another to sort the cells in the columns and a third to sort the cells at the level of the whole board, to cover the cases in which the sorting of rows and columns gets stuck.
pbDrawing.Image = null;
_rwLock = new ReaderWriterLock();
List<Task> tasks = new List<Task>();
try
{
    RandomizeBoard();
    pbDrawing.Image = DrawBoard();
    Application.DoEvents();
    Thread.Sleep(2000);
    tasks.Add(Task.Run(() => ProcessRows()));
    tasks.Add(Task.Run(() => ProcessColumns()));
    tasks.Add(Task.Run(() => ProcessGlobal()));
    Task.WaitAll(tasks.ToArray());
    pbDrawing.Image = DrawBoard();
}
catch (Exception ex)
{
    MessageBox.Show(ex.Message);
}
finally
{
    foreach (Task t in tasks)
    {
        t.Dispose();
    }
}
The Thread.Sleep function performs a wait for a given millisecond interval. Its only purpose in this case is to allow visualize the disordered board before showing it ordered. The three tasks have a similar structure, first there is a part that only performs data readings in which two cells that are not in place are searched, and this block is protected by a reading lock with the AcquireReaderLock method, to which it is passed an interval in milliseconds to set a maximum waiting time to try to acquire the lock. This part of the code must be enclosed in a try / catch / finally block to make sure that the lock is released with the ReleaseReaderLock method. This is the code for the case of the rows:
_rwLock.AcquireReaderLock(1000);
try
{
    for (int row = 0; row < 8; row++)
    {
        for (int col = 0; col < 8; col++)
        {
            if (!PositionOK(col, row))
            {
                for (int col2 = 0; col2 < 8; col2++)
                {
                    if ((col2 != col) &&
                    (!PositionOK(col2, row)) &&
                    (_board[col, row] != _board[col2, row]))
                    {
                        pr1 = new Point(col, row);
                        pr2 = new Point(col2, row);
                        color1 = _board[col, row];
                        color2 = _board[col2, row];
                    }
                }
            }
            if (pr1.X >= 0)
            {
                break;
            }
        }
        if (pr1.X >= 0)
        {
            break;
        }
    }
}
finally
{
    _rwLock.ReleaseReaderLock();
}
The structures pr1 and pr2, of Point type, will contain the positions of the board to be exchanged, and color1 and color2, of type bool, will indicate if they are white or black. Once we have found two boxes to exchange, we will go to the part of the task that performs the exchange, which must be protected with a write lock with AcquireWriterLock:
_rwLock.AcquireWriterLock(1000);
try
{
    if ((_board[pr1.X, pr1.Y] == color1) && (_board[pr2.X, pr2.Y] == color2))
    {
        bool tmp = _board[pr1.X, pr1.Y];
        _board[pr1.X, pr1.Y] = _board[pr2.X, pr2.Y];
        _board[pr2.X, pr2.Y] = tmp;
    }
}
finally
{
    _rwLock.ReleaseWriterLock();
}
Since we have three tasks competing to exchange the cells, before making the exchange we must ensure that the cells still have the initial colors, since another task could have moved one of them. The BoardCompleted function will indicate when the entire board is sorted and the tasks can end.
Another option to operate with variables in a protected way is using the Interlocked class. With it we can perform simple arithmetic operations with integers or change the value of one variable with another having exclusive access to it, in an atomic operation. It is a class that only has static methods, we can add a quantity to an integer, with the Add function, increase or decrease in a unit a variable of type int or long with Increment and Decrement, change the value of one variable with another one with Exchange or do it conditionally with CompareExcange, getting the old value as a result, or simply read its value with Read.
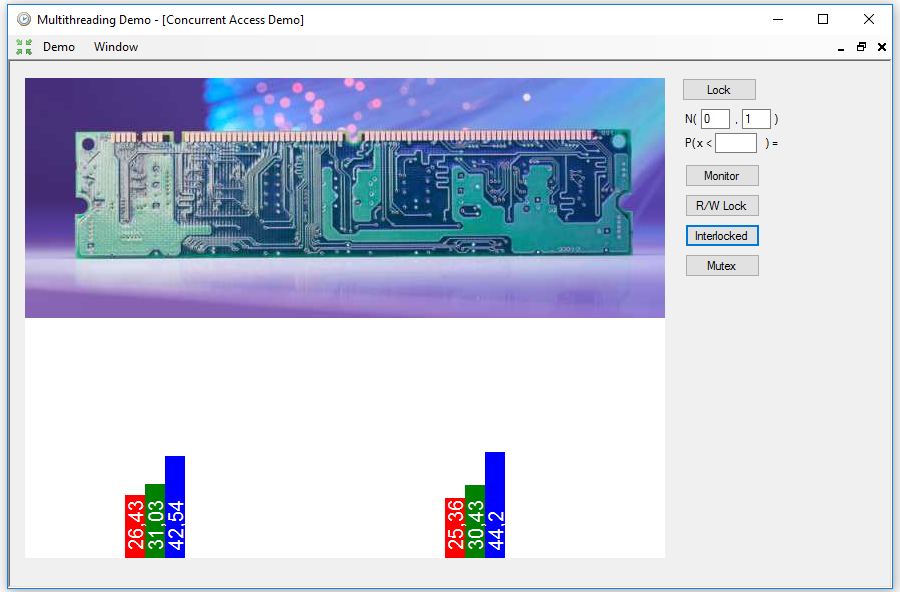
The example I am going to show calculates the proportion of red, green and blue of an image, first using all the pixels of the image and then making an average of the calculation using a random sampling of points with several tasks. The result, when pressing the Interlocked button, is as follows:

In the histogram on the left is the exact value of the proportions, while in that on the right is the average obtained from 30 random samples of only 10,000 pixels.
The complete sampling is done in the following way, using the _bitmap array of int where the pixels of the image have been copied to optimize the performance:
float pr = 0f;
float pg = 0f;
float pb = 0f;

float den = 640f * 420f;

for (int ix = 0; ix < 640 * 240; ix++)
{
    pr += (_bitmap[ix] & 0xFF0000) >> 16;
    pg += (_bitmap[ix] & 0x00FF00) >> 8;
    pb += (_bitmap[ix] & 0x0000FF);
}

pr /= den;
pg /= den;
pb /= den;

den = (pr + pg + pb);

pr /= den;
pg /= den;
pb /= den;
Then, with a Parallel.For loop, 30 samples of 10,000 points are taken and the sum of all of them is done to calculate the average value. This operation is protected using Interlocked.Add, so that we can prevent exceptions if two or more tasks try to add its result at the same time.
long rr = 0;
long rg = 0;
long rb = 0;

Parallel.For(0, 30, (n) =>
{
    Random r = new Random();
    long lrr = 0;
    long lrg = 0;
    long lrb = 0;

    int bx = 0;

    for (int ir = 0; ir < 10000; ir++)
    {
        int x = bx + r.Next(15);
        lrr += (_bitmap[x] & 0xFF0000) >> 16;
        lrg += (_bitmap[x] & 0x00FF00) >> 8;
        lrb += (_bitmap[x] & 0x0000FF);
        bx = x;
    }
    Interlocked.Add(ref rr, lrr / 10000);
    Interlocked.Add(ref rg, lrg / 10000);
    Interlocked.Add(ref rb, lrb / 10000);
});

float frr = rr / 30f;
float frg = rg / 30f;
float frb = rb / 30f;

den = (frr + frg + frb);

frr /= den;
frg /= den;
frb /= den;
All of these mechanisms can be used within the same application, but there is also another one that allows synchronizing processes between different applications. It is the Mutex class, also called mutual exclusion. Its operation is similar to that of the lock statement or the Monitor class if it is used within the same application, but the Mutex can also be created with a global level, so that it can be shared with other applications, if you give it a name using some of the versions of the constructor.
In order to obtain exclusive access to a resource, you have to use the WaitOne method of the Mutex. All successive calls to this method from other tasks or processes will result in blocking them until the first one releases the Mutex with the ReleaseMutex method.
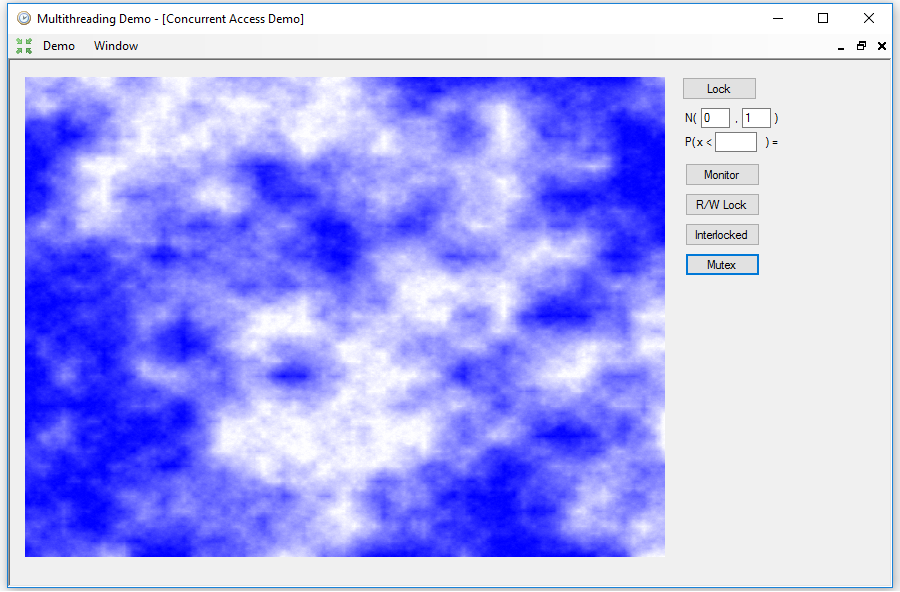
To show an example of this mechanism, I added the MutexExample console application to the solution. This application generates a .bmp file in which a plasma type fractal that simulates clouds is drawn.
With the Mutex button, the global Mutex object is created, and then the console application is launched to generate the image, using again the Process class. We wait a couple of seconds with Thread.Sleep to make sure that the console application has obtained exclusive access to the Mutex, and then we wait for the bitmap to be generated by using the WaitOne method, to finish showing the picture in the window:
pbDrawing.Image = null;
try
{
    _mutex = new Mutex(false, "MUTEX_EXAMPLE");
    File.Delete("plasma.bmp");
    Process p = new Process();
    p.StartInfo.Arguments = "plasma.bmp";
    p.StartInfo.FileName = "MutexExample.exe";
    p.Start();
    Thread.Sleep(2000);
    _mutex.WaitOne();
    _mutex.ReleaseMutex();
    using (Bitmap bmp = Bitmap.FromFile("plasma.bmp") as Bitmap)
    {
        Bitmap bcopy = new Bitmap(bmp.Width, bmp.Height, bmp.PixelFormat);
        Graphics gr = Graphics.FromImage(bcopy);
        gr.DrawImageUnscaled(bmp, 0, 0);
        gr.Dispose();
        pbDrawing.Image = bcopy;
    }
}
catch (Exception ex)
{
    MessageBox.Show(ex.Message);
}
finally
{
    if (_mutex != null)
    {
        _mutex.Close();
        _mutex = null;
    }
}
The result will be similar to this, since the fractal is generated in a random way:

In the MutexExample application, the first thing to do is to obtain the global Mutex using the OpenExisting static method, then acquire exclusive access with WaitOne and then generate the image. To finish, the waiting processes are signaled by calling ReleaseMutex:
Mutex mx = Mutex.OpenExisting("MUTEX_EXAMPLE");
mx.WaitOne();
_rand = new Random();
BitmapData bf = null;
try
{
    _bitmap[0] = 1 + ((_rand.Next(32767) / 256) * 255) >> 7;
    _bitmap[639] = 1 + ((_rand.Next(32767) / 256) * 255) >> 7;
    _bitmap[639 + 479 * 640] = 1 + ((_rand.Next(32767) / 256) * 255) >> 7;
    _bitmap[479 * 640] = 1 + ((_rand.Next(32767) / 256) * 255) >> 7;

    Divide(0, 0, 639, 479, 30);
    for (int ix = 0; ix < _bitmap.Length; ix++)
    {
        _bitmap[ix] = Color.FromArgb(255 - _bitmap[ix],
            255 - _bitmap[ix], 255).ToArgb();
    }

    bf = bmp.LockBits(new Rectangle(0, 0, 640, 480),
        ImageLockMode.ReadWrite, PixelFormat.Format32bppRgb);
    Marshal.Copy(_bitmap, 0, bf.Scan0, 640 * 480);
    bmp.UnlockBits(bf);
    bf = null;
    bmp.Save(bmpfile);
    mx.ReleaseMutex();
}
catch (Exception exi)
{
    if (bf != null)
    {
        bmp.UnlockBits(bf);
    }
    gr.DrawString(exi.Message, f, Brushes.White, 0f, 0f);
    bmp.Save(bmpfile);
    mx.ReleaseMutex();
}
That's all with respect to the classes that allow us to control concurrent access. In the next article I will show how to interact with the Windows User Interface from another tasks.


